Radon is a silent threat that can lurk in your home without any obvious signs. You might not see it, smell it, or taste it, but high radon levels can seriously impact your health.
So how do you know if your home is safe? Measuring radon is the first crucial step to protect yourself and your loved ones. You’ll discover simple and effective ways to test radon levels in your home, understand the results, and learn what actions to take next.
Don’t leave your family’s safety to chance—read on to find out exactly how to measure radon and take control of your indoor air quality today.
Radon Basics
Understanding radon is the first step in measuring it accurately. Radon is a gas that you cannot see, smell, or taste. It comes from natural materials in the ground.
This section covers the basics of radon. Learn what it is, why it matters, and where it comes from. Knowing this helps you take the right steps to measure and reduce radon in your home.
What Is Radon?
Radon is a radioactive gas. It forms when uranium breaks down in soil, rock, and water. It moves through the ground and can enter buildings through cracks or gaps. Radon builds up indoors and can reach harmful levels.
Health Risks Of Radon Exposure
Radon is the second leading cause of lung cancer in the United States. Breathing high radon levels can damage lung tissue. The risk increases for smokers exposed to radon. Long-term exposure is especially dangerous.
Common Sources Of Radon
Radon mainly comes from the soil beneath your home. It can also come from well water or building materials. Houses with basements or crawl spaces often have higher radon levels. Radon can enter through foundation cracks and gaps around pipes.
Credit: www.youtube.com
Types Of Radon Tests
Measuring radon levels in your home requires choosing the right test type. Radon tests fall into three main categories. Each type has different uses and accuracy levels. Understanding these options helps pick the best one for your situation.
Passive Test Devices
Passive radon test devices do not need power to work. They sit in a room for a set time, usually a few days to 90 days. After testing, you send the device to a lab. The lab measures the radon level. These tests are simple and cost-effective. They include charcoal canisters, alpha track detectors, and electret ion chambers.
Active Test Devices
Active radon test devices need electricity to operate. They monitor radon continuously and store hourly data. Professionals often use these for detailed analysis. Active devices give quick results, usually within a few days. They can detect changes in radon levels over time. Examples include continuous radon monitors (CRMs).
Digital Home Monitors
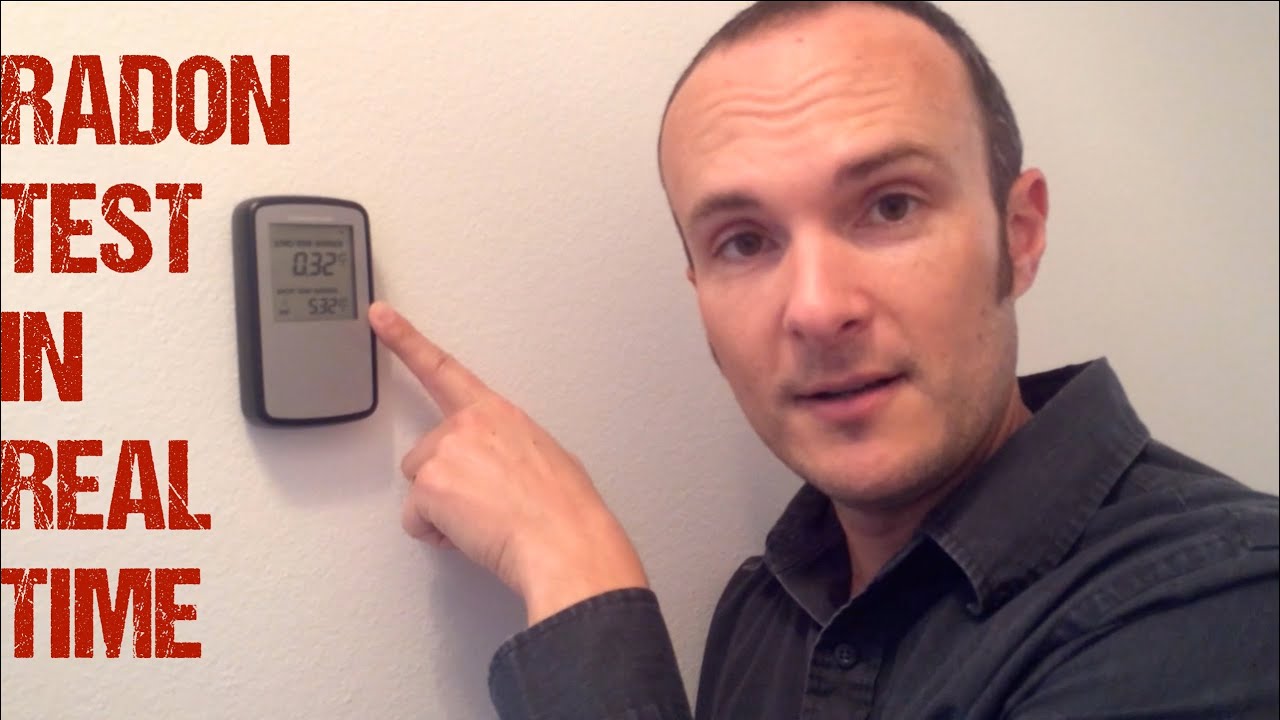
Digital home monitors provide real-time radon readings. They connect to your phone or computer for easy tracking. These devices offer long-term monitoring with instant alerts. Homeowners can check radon levels anytime. They help maintain safe indoor air quality. Popular brands include Airthings and other smart radon detectors.
Choosing A Radon Test
Choosing the right radon test is key to understanding your home’s radon levels. Radon is a colorless, odorless gas that poses health risks. Testing helps reveal if your home has unsafe radon concentrations. There are various testing methods available. Each method suits different needs and budgets. Knowing your options helps you pick the best test for your situation.
Short-term Vs Long-term Testing
Short-term tests last from two to 90 days. They provide quick results but may not reflect true yearly radon levels. Long-term tests run for more than 90 days. They capture seasonal changes and give a better average radon level. Choose short-term tests for fast screening. Opt for long-term tests for more precise results over time.
Professional Testing Services
Certified radon testers use specialized tools to measure radon accurately. They follow strict guidelines to ensure reliable results. Professionals can interpret results and suggest solutions. Hiring experts reduces the chance of errors. They can also test your entire home thoroughly. This option suits those wanting peace of mind and expert advice.
Diy Test Kit Options
DIY kits are affordable and easy to use. You place detectors in your home and send them to a lab. Results arrive by mail or online. These kits come in short-term and long-term versions. Follow instructions carefully to get valid results. DIY testing is a good choice for budget-conscious homeowners. It offers a practical way to check radon levels yourself.
Preparing For Radon Testing
Preparing for radon testing ensures accurate and reliable results. Proper setup helps detect radon levels effectively. Understanding key factors before testing is essential for a safe home environment.
Ideal Testing Conditions
Test during closed-house conditions. Keep windows and doors shut for at least 12 hours before testing. Avoid running fans or ventilators that change indoor air. Maintain normal heating or cooling systems. Test in stable weather without strong winds or storms. Choose a period when the home is occupied normally.
Avoiding Common Testing Errors
Do not place test kits near drafts or vents. Avoid areas with high humidity such as kitchens and bathrooms. Do not disturb the test device during the testing period. Follow the test kit instructions exactly. Start testing away from exterior walls or open windows. Prevent interference from pets or children around the device.
Where To Place Test Devices
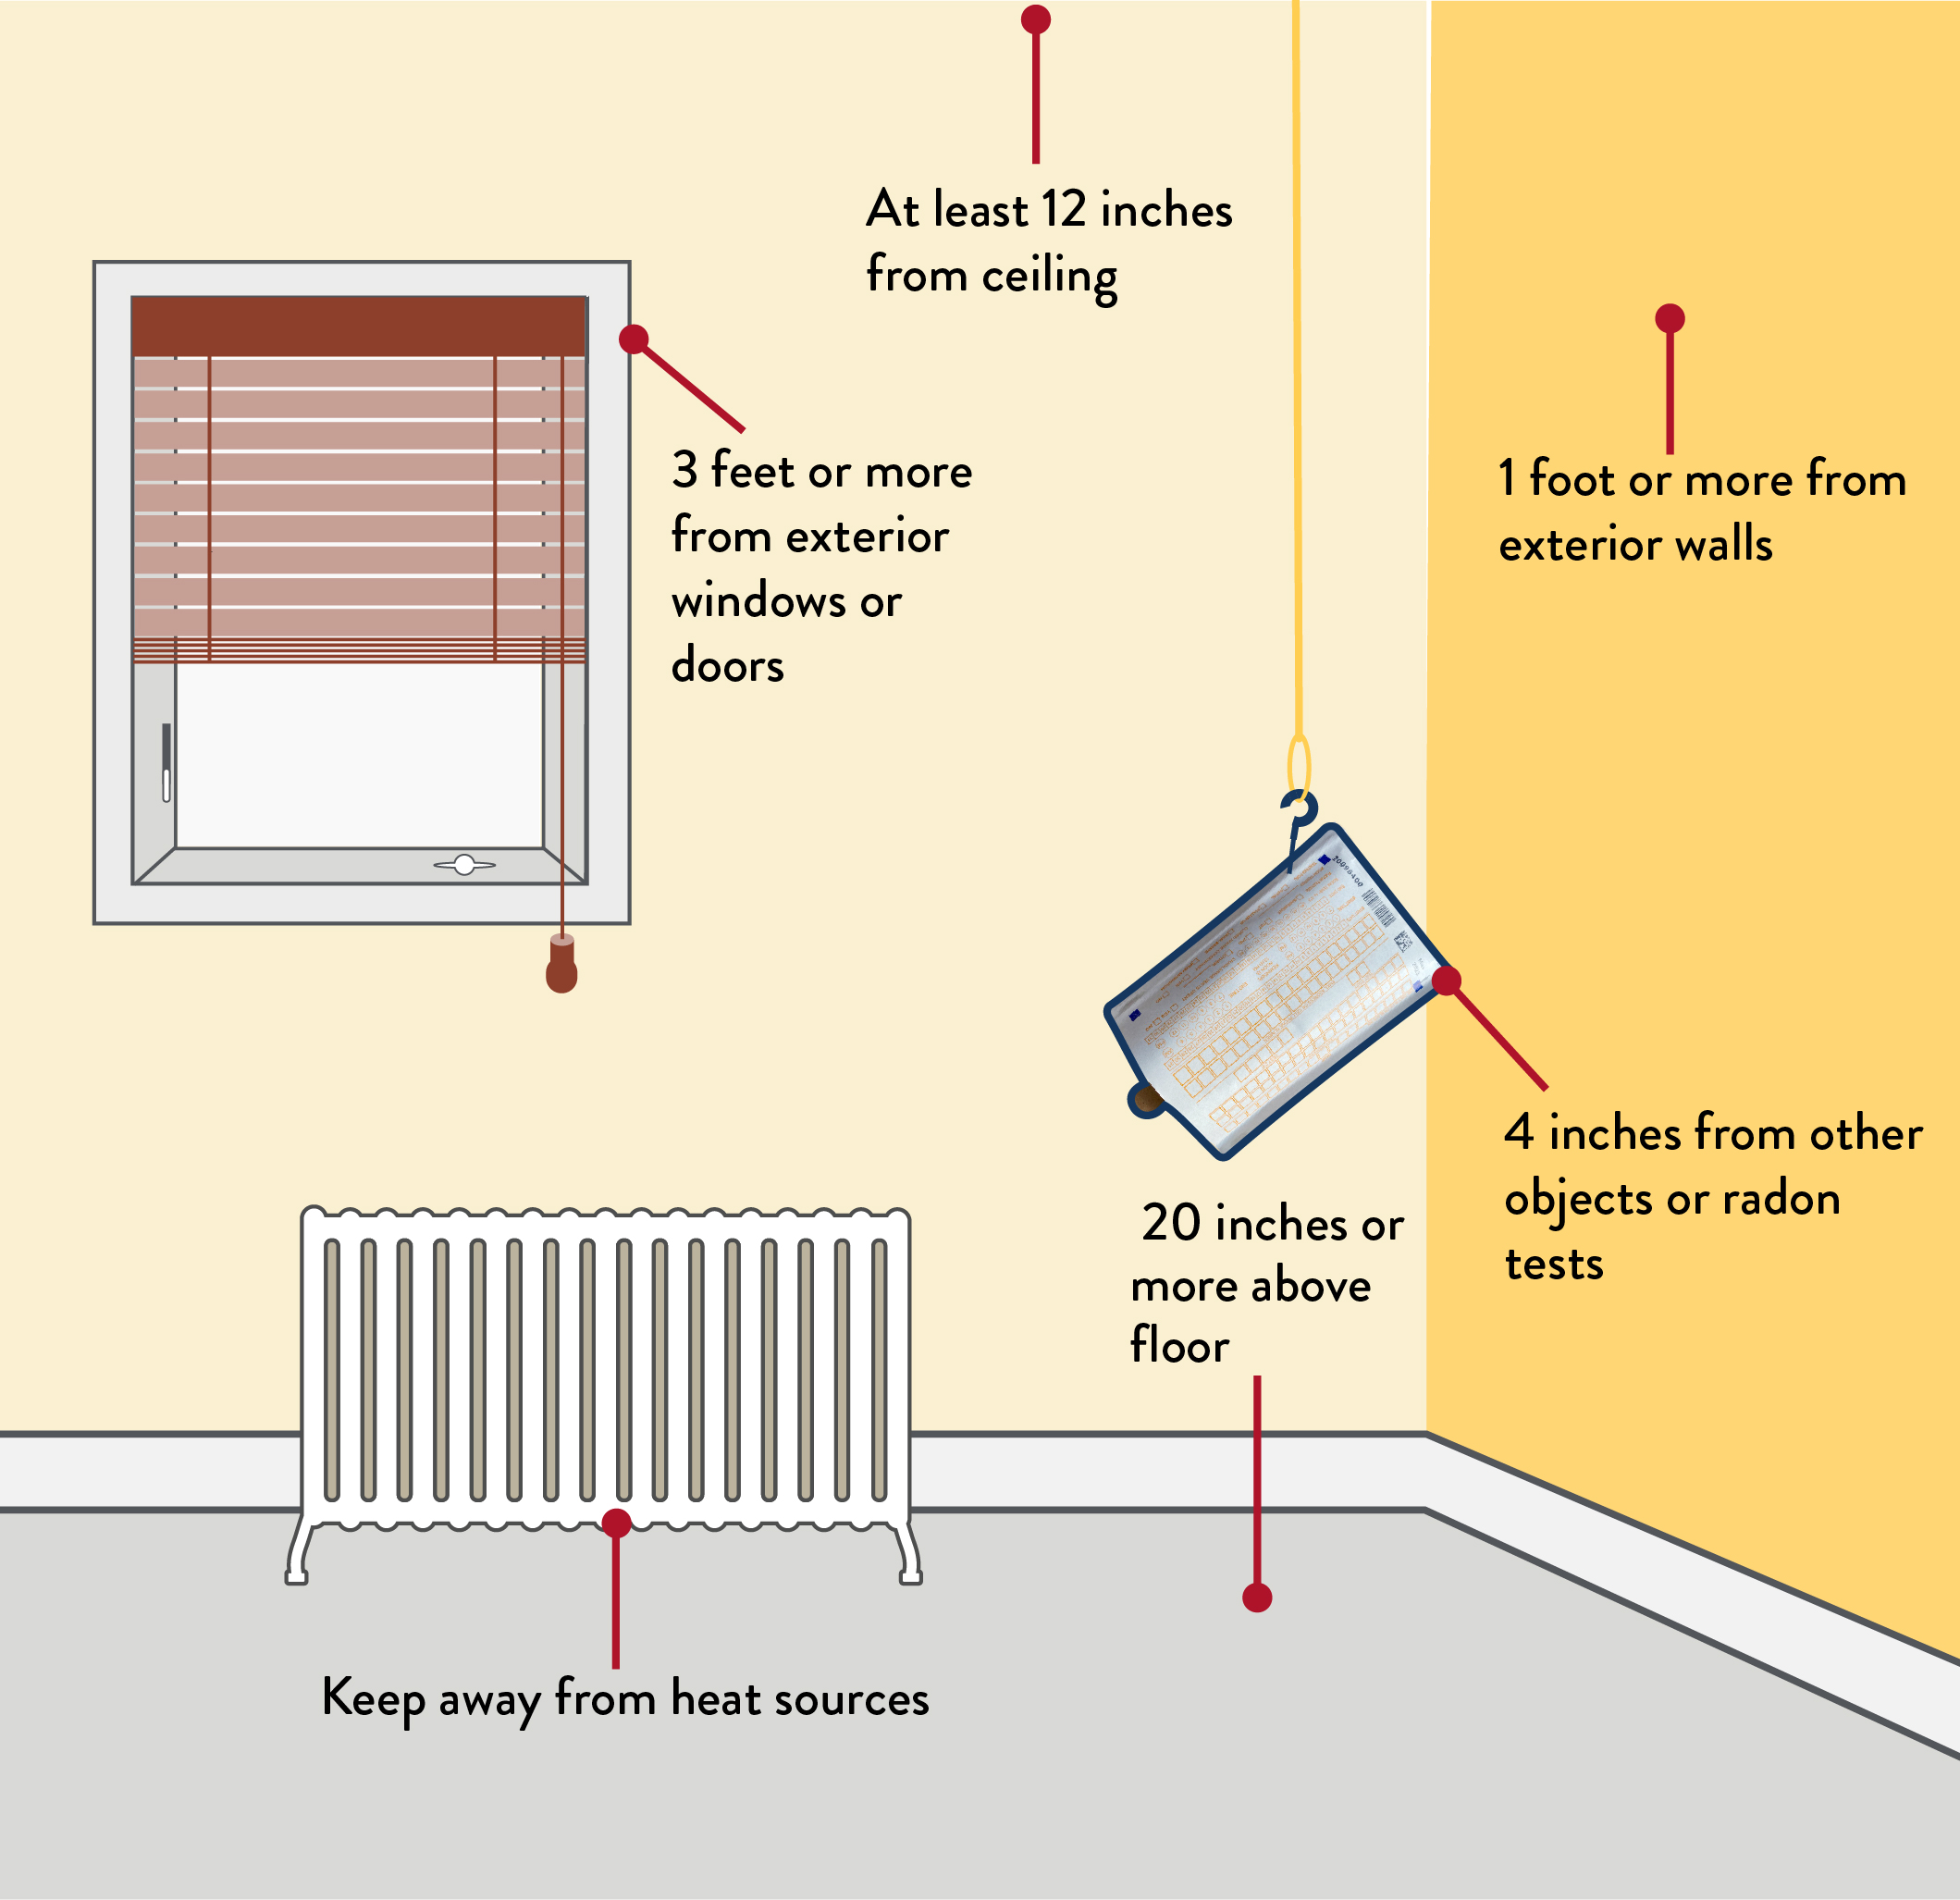
Place the device in the lowest lived-in level of your home. Avoid basements used only for storage. Put it in a central room, away from walls or furniture. Keep it at least 20 inches above the floor. Avoid placing near heat sources or direct sunlight. Ensure it is out of reach of pets and children for safety.
Conducting The Test
Conducting a radon test is a simple task that anyone can do with the right tools and instructions. Proper testing ensures you get accurate results about your home’s radon levels. This section guides you through the process, focusing on handling test devices safely and knowing the right time to start and end your test.
Step-by-step Testing Process
First, select a testing device. Common options include charcoal canisters or digital radon detectors. Place the device in the lowest lived-in level of your home, usually the basement or first floor.
Set the device away from drafts, windows, doors, and vents. Avoid kitchens and bathrooms because humidity affects results. Keep it at least 20 inches above the floor and out of direct sunlight.
Leave the device undisturbed for the recommended time. This usually ranges from 2 to 7 days for short-term tests. After testing, seal the device carefully if required and send it to the lab for analysis if it’s a passive device.
Handling Test Devices Safely
Always handle radon test kits with clean, dry hands. Avoid touching the detection area to prevent contamination. Follow all packaging instructions to ensure device integrity.
Do not open or tamper with the device during testing. Keep children and pets away from the testing area. Store the kit in a safe, stable spot to prevent spills or damage.
Once testing is complete, use gloves or wash your hands before handling the device for mailing. Proper handling helps maintain the accuracy of your radon measurement.
When To Start And End Testing
Begin testing during the cooler months, ideally between October and April. This is when homes are closed up, and radon levels tend to be higher. Avoid testing during extreme weather changes.
Start the test after at least 12 hours of keeping windows and doors closed. Maintain this closed-house condition throughout the test period.
End testing exactly as the device instructions state, typically after 48 to 96 hours for short-term tests. Remove the device carefully and prepare it for analysis or reading according to the instructions.

Credit: www.nationalradondefense.com
Interpreting Test Results
After testing your home for radon, understanding the results is crucial. Radon levels tell you if your home is safe or needs action. This section explains how to read and interpret your radon test results clearly. It guides you through what the numbers mean and what steps to take next.
Understanding Pci/l Measurements
Radon levels are measured in picocuries per liter (pCi/L). This unit shows the amount of radon in the air. The higher the number, the more radon is present. Test results usually show an average reading over the testing period. This average helps you see the typical radon exposure in your home.
Safe And Unsafe Radon Levels
The U.S. Environmental Protection Agency (EPA) recommends action at 4 pCi/L or higher. Levels below 2 pCi/L are generally considered low risk. Between 2 and 4 pCi/L is a moderate range, and you may want to test again. Radon above 4 pCi/L means your home needs mitigation to reduce the risk.
Next Steps After Testing
If your radon level is high, consider hiring a professional to fix the problem. Radon mitigation systems can lower radon levels effectively. Retest your home after mitigation to ensure the system works. For low levels, you may retest every few years to confirm safety. Always keep test results for future reference and home sales.
Reducing Radon Levels
Reducing radon levels is essential to protect your health. Radon is a dangerous gas that can cause lung problems. Taking steps to lower radon helps keep your home safe. Several methods exist to reduce radon effectively. Choosing the right approach depends on your home’s structure and radon levels. Understanding these options can guide your next move.
Common Radon Mitigation Methods
One popular method is soil suction, which pulls radon from below the house. This system uses pipes and fans to vent radon outside. Sealing cracks in floors and walls also blocks radon entry. Improving home ventilation lowers radon concentration indoors. Sometimes, a combination of methods works best for reducing radon.
Hiring A Radon Mitigation Professional
Professionals have the tools and skills to fix radon problems safely. They test radon levels and recommend the best solutions. Certified experts install mitigation systems properly to ensure effectiveness. Hiring a pro reduces risks and provides peace of mind. Always choose licensed and experienced radon mitigators for your home.
Maintaining Low Radon Levels
Regular radon testing is key to keeping levels low. Check your system yearly and after major repairs. Replace fans or parts as needed to maintain airflow. Keep foundation cracks sealed to prevent radon leaks. Proper maintenance protects your family and keeps your home safe over time.
Credit: www.health.state.mn.us
Frequently Asked Questions
Can I Test For Radon Myself?
Yes, you can test for radon yourself using a DIY radon test kit. Place the kit in a low-draft area for 2-7 days. Then, send it to a lab for analysis. Long-term tests provide more accurate results. Follow all instructions carefully for reliable measurements.
Which Rocks Give Off Radon?
Granite, shale, phosphate, and certain metamorphic rocks release radon gas. Uranium-rich rocks produce higher radon levels.
Does Radon Cause Parkinson’s?
Radon exposure links mainly to lung cancer, not Parkinson’s disease. No scientific evidence shows radon causes Parkinson’s.
What Are Signs Your House Has Radon?
Signs your house has radon include cracks in the foundation, unexplained health issues, musty odors, and neighbors’ high radon levels. Testing is essential to confirm radon presence.
Conclusion
Measuring radon is important for keeping your home safe. Use the right test device and follow instructions carefully. Test results show radon levels in your air. Low levels mean less risk, high levels need action. Regular testing helps track changes over time.
Simple steps can protect your family’s health. Don’t wait—check your home today for radon.